Travel Portrait Photography – Tips For Taking People’s Photos While Traveling

Woman from a local tribe with a long pipe

Travel Portrait Photography
Tips For Taking People’s Photos While Traveling

Our travel portrait photography guide outlines the best tips and tricks for taking people’s photos while traveling. From tips for nailing your composition, choosing your location, cultural sensitivity, and approaching people to the more technical stuff that will help you improve your portrait photography and take better travel and cultural portraits.

Ask us what we love more, traveling or photography, and we’ll have a hard time giving you an answer. Travel photography combines both of our passions, taking photos and videos and experiencing other cultures. Travel photography includes many aspects and elements of highlighting the local culture, from the architecture and landscape to the customs and food. Though we try to incorporate all of these elements and more while creating our photo essays to convey the story of the place we’re traveling in, our true passion lies in cultural portraits. We love to learn about the local culture mainly by highlighting the human element. We love taking people’s photos while traveling, and in our opinion, it’s the best way to deepen your knowledge about the local culture and truly get to know the place you are traveling in.

So how do you do that? Showcasing the local culture while focusing on the human element? We like to visit local markets and artists. We love strolling around local streets and alleys, trying to capture a fleeting moment or the vignettes of daily life through our lens. We always try to tell a story with our images, and it is something we’ve learned over the years. If you want to improve your travel portraits, if you want to know how to approach people and learn how to tell a story with your lens, this article has all the tips you need and then some. We start by giving some general tips for taking awesome travel portraits and then dig in deeper into the more technical stuff. 


This post may contain affiliate links, which means we earn a small commission if you purchase from them (no extra costs to you!). For details check our disclaimer.

Table of Content

Why Is Travel Portrait Photography So Powerful

Capturing the essence of a place can come in many forms. You can take pictures of the food, architecture, or landscapes but taking pictures of the people not only helps you showcase the local culture, it also provides endless opportunities for interactions with the local residents and deepens your knowledge about the local culture. No matter if you snap a picture of a local lady in the market or if you take pictures of the local cheesemaker or artisan, you will have an opportunity to make a connection with them. It might be just a smile or a nod of the head; it’s up to you to make it a bit more than that and learn about that person’s life. Ask the lady in the market about the local fruits and vegetables, inquire the cheesemaker about the process of making cheese or how he got into the cheese-making business, ask the artist about the tradition behind his craft. These interactions with local people provide a glance into the local customs and personal lives of the local residents. Besides, as a photographer, you want your pictures to evoke an emotion and tell a story, and in our opinion, travel portraits are the best way to achieve this goal.

Get our FREE Maps-2-Go

Get monthly updatesincluding exclusive access to our google maps which feature all of our favorite attractions in numerous cities all over the world. 

I want to subscribe to your NEWSLETTER!

Types of Travel Portraits

Let’s start from the beginning and talk about the different types of travel portraits. Most people think that portrait photography is taking a close-up or medium shot of a person, but that’s not entirely true since there are other kinds of portrait photography.

Classic Portrait

When you take a picture of your subject that fills up the whole frame, that’s a classic portrait. It can be just the face, part of the face, or even the entire body.

Environmental Portrait

The environmental portrait is different from your classic portrait since you’ll fill the frame with your subject and the environment. The environmental portrait is all about showcasing the place of work of your subject, where he lives, his personality, hobbies etc.

Details Portrait

Sometimes you don’t need to capture the face of your subject. Highlighting just a part of the body can tell a story as well. You can focus on a unique outfit, special shoes, hands, and so on. 

batik stamp
Details portrait
a smiling Burmese girl
Classic portrait
שווקים במיאנמר בורמה
Environmental portrait

Challenges of Taking People’s Photos While Traveling

If you are a travel portrait photographer, you have to face many challenges before getting the perfect shot. Most times, you won’t be able to control the light or carry a lot of equipment with you. If it’s a candid shot, you need to be quick about it, and even if it’s not, you can’t keep your subjects from their daily routines for a long time. You’ll need to learn how to approach people if you’d like to take their photo from up close; there will be cultural differences, language barriers, and many more issues you’ll have to deal with. There is also the ethical issue of taking people’s photos without their permission or using your travel portraits across social media.

Travel Portraits – Ethical Issues of People Photography

In recent years more and more voices have started speaking about the ethics of people photography. Should you ask for permission before taking a photo? Should you take pictures of children? Should you post your photos across social media? Should you sell your photos? Some are even claiming that in the era of social media, Westerns seem to treat people in third world countries as if they were animals in a zoo, snapping pictures of the “exotic creature” without permission. There are also questions regarding the photographs’ authenticity and the different approach in people photography. Some photographers would not dream of staging a moment, while others claim it’s the only way to get breathtaking travel portraits of their subject matter.

So what’s the right answer? You’ll have to decide for yourself. We have our own rules of conduct that we try to follow. Regarding permission, if it’s a candid shot, there’s no point in asking for permission because the moment will be lost forever. If our subject is aware of our presence, we’ll ask for consent—either verbally or by gesturing to our camera. If we notice that someone isn’t happy about us snapping a picture of him, we’ll apologize and delete the image. When we do ask for permission, we do it with a smile and accept the fact the photograph is going to be a bit staged, which can even be a good thing at times. In fact, after our encounter with a group of photographers in Myanmar’s Inle Lake, we realized some of the most stunning shots on Instagram must have been staged. Regarding social media and posting photos on our site, we make a point of choosing images that we feel flatter our subject. We’ll never post a picture that showcases someone in a negative light. We love to highlight a place by taking photos of the daily life and local customs and traditions, so for us people photography and travel portraits are a big part of our cultural photo essays.

We encourage you to think about these ethical questions and decide for yourself how to behave but always be respectful, accept “no” as an answer and treat your subjects like you would like to be treated. Think about your intention and only post pictures that you believe flatter your subjects.

Travel Portrait Photography Tips and Tricks - General

Research your Destination - History, Customs and More

Before going anywhere, we do our research. We’ll start reading a little bit about the history and culture of the place we plan on visiting. You have to know at least the basics about the local culture in terms of Do’s and Don’ts and make sure to search for these social cues while traveling. If people leave their shoes at the entrance to a temple, follow their lead and if you’re not sure, ask one of the local residents. You should especially be culturally sensitive when taking pictures of children, and if you see a child with his parents, always ask for permission before photographing them.

Regarding locations, research online for the sights you’d like to see, but also, always look beyond the obvious sights and attractions if you’d like to be a bit more original and capture more authentic shots.

Woman sorting out tea leaves
Documenting everyday lives makes for great environmental portraits
אישה מקומית באגם אינלה במיאנמר בורמה
Close ups are great but sometimes the scenery adds a little extra something

Learn a Few Phrases in the Local Language

Learning a few phrases and words in the local language goes a long way. It’s much easier to make someone smile or have a positive attitude when you speak a few words of his language. Moreover, it’s much more respectful when you visit another country, and you make the effort of learning how to say ‘thank you’ ‘you welcome’ and so on in the native language.

In terms of travel portraits, it’s a good idea to learn how to ask ‘what is your name’ ‘May I take a picture’ ‘thank you’ ‘how to say’ and perhaps a few adjectives like ‘beautiful smile’ ‘nice’ etc. People tend to be more open and listen to you or give you the time of day when you make an effort to learn their language. They will gladly help you learn a few more words if you ask them ‘how to say’ and point to an object. It’s also a great way to break the ice and even get a candid moment from a somewhat staged situation. 

Search for Things You’d like to Photograph

Besides learning about the local culture and etiquettes, list your interests and favorite places you’d like to visit. We love local markets and art, so we always look for the best markets, and we intentionally search online for local artists we could see or local festivals or events that take place during our visit.

Be Ready

First of all, always have your camera ready. Stumbling upon a magical moment and having your camera in the bag will result in heartbreak (and we’re talking from experience). You always need to be ready to shoot, and that means choosing your camera’s setting and looking around for interesting situations.

Travel Portrait Photography Tip: Most DSLR/Mirrorless cameras have custom buttons. You can choose your custom settings and assign them to these buttons. For example, you can assign the perfect setting for an outdoor photoshoot to one of them, and the second can be used for a low-light setting.  

Are You Going for a Staged Photo or a Candid Photo

There’s something magical about a candid travel portrait. You were able to capture a fleeting moment, one perfect shot that no one will be able to reproduce. We love taking candid photos. It’s all about street photography and catching that decisive moment. However, staged shots have their own merits and charm.

What is a staged shot? Many times, once you ask for permission from your subject, it’s going to be a staged shot (including a big cheesy smile). Your subject’s posture and facial expression are going to change, and many times it won’t be as unique or authentic as it was before. Nevertheless, there are ways to make your subjects act or pose more naturally, and we’ll discuss it later.

Now there are those staged shots when you tell your subject how to act, where to look, what to do or even where to stand. It can be awkward at first, but that’s the best way to get a perfect portrait (provided your subject is following along with your guidelines).

local woman from the hill tribes myanmar
Think about composition and don't be afraid to break the rules
שבטים אתניים במיאנמר בורמה

Approaching People/Asking Permission

Most times, we ask people for permission before or after we take the picture. Many times, while we’re taking the shot, the person might notice us, and we ask for permission with a gesture. If he seems comfortable with it, we’ll continue shooting; if not, we’ll apologize and delete the images.

There are times when we ask for permission in advance, especially when we get really close to our subject. We smile, point to the camera and to him/her, sometimes we introduce ourselves and try to say a few words and see if it’s ok. Sometimes after a short conversation, people will change their minds and let you take their picture.

It is not easy, and for us, it has always been and still is one of the most challenging aspects of people’s photography, but we’ve learned to overcome our shyness. Even if you’re not sure, there’s no harm in trying, and remember to always be polite and thank them with a smile even if they say no.

Keep Smiling, Show Your Interest and Engage with Your Subjects

No matter what happens, always keep smiling and have a positive attitude. It’s not just about approaching people but also about taking candid photos, talking to people on the street, addressing your waiter, and so on. Not just while traveling, keeping a big smile, having a positive attitude, and showing a genuine interest in the daily lives and local traditions of anyone you meet can open the door to many opportunities. If you’re taking pictures of a local, ask for recommendations for the area. If you’re photographing a local artist, ask about the process, and by doing so, you might learn about another craft you’d like to photograph.

Get Close

Get close to your subjects! Yes, using a zoom lens might give you beautiful classic portraits with nice bokeh in the background, and it’s definitely less obtrusive,  but you’ll get the best travel portraits by getting close to your subjects.

When you take a candid shot of a street or a market scene, it’s always best if you have someone close in the foreground since it adds perspective, depth, and interest to your photo. It also allows you to make a real connection with your subject.

Reciprocation

After you’ve learned how to approach people and engage with them, what about reciprocation? Should you offer to pay them for their portraits? Should you buy something from them? There’s no right answer to these questions, and we judge each situation as it comes.

We don’t encourage paying someone for taking his portrait, especially in third world countries, since many times it creates a habit. People are expecting a payment, they might be rude about it, and in some countries, children are taken out of schools and go “work” in the streets by posing for tourists. If someone asks us for money, we simply smile, shake our heads and go away. A few times in the past, especially in Vietnam, I refused, and then the women called me back to take their portraits after all ; fter taking a few snaps, I bought some items from them.

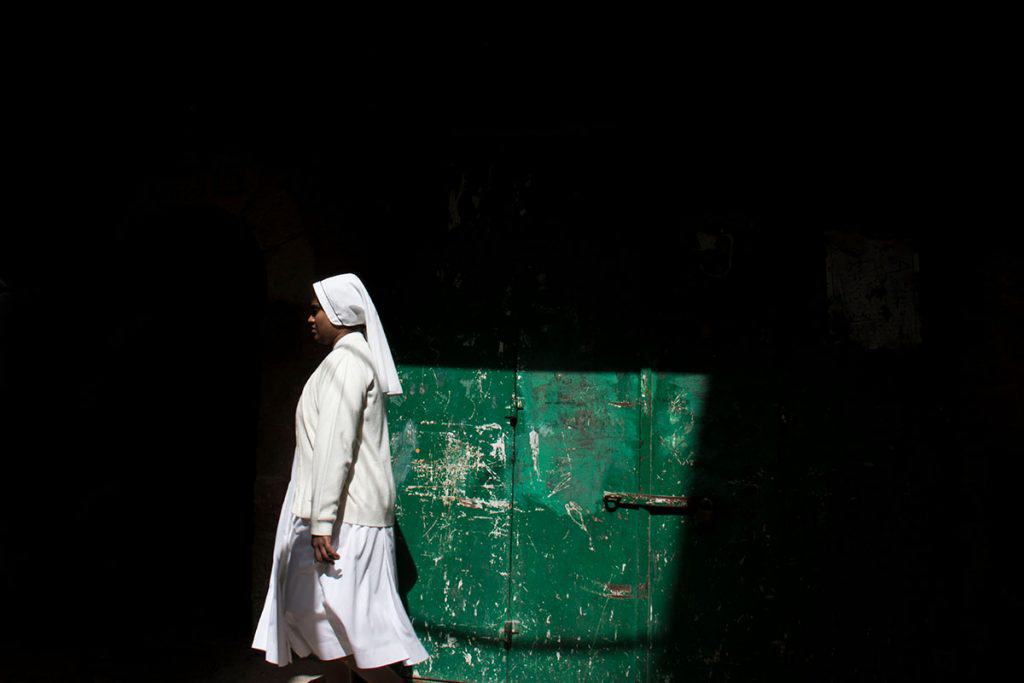
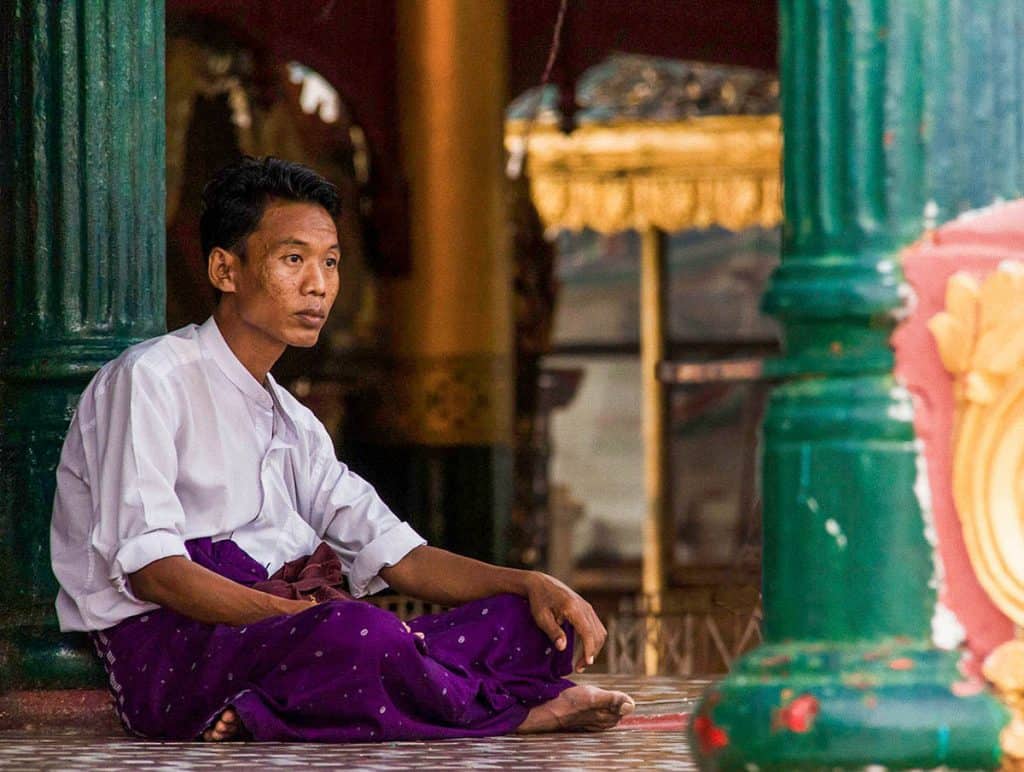
Nevertheless, there’s an exception to that rule. Many times, especially in third-world countries and especially in pagodas or nunneries, it’s customary to donate a small amount of money for the living expenses of the nuns/monks. Other times, if you’d like to ask someone to pose for you and you are going to give them instructions and spend a while there, you should definitely consider paying him/her.

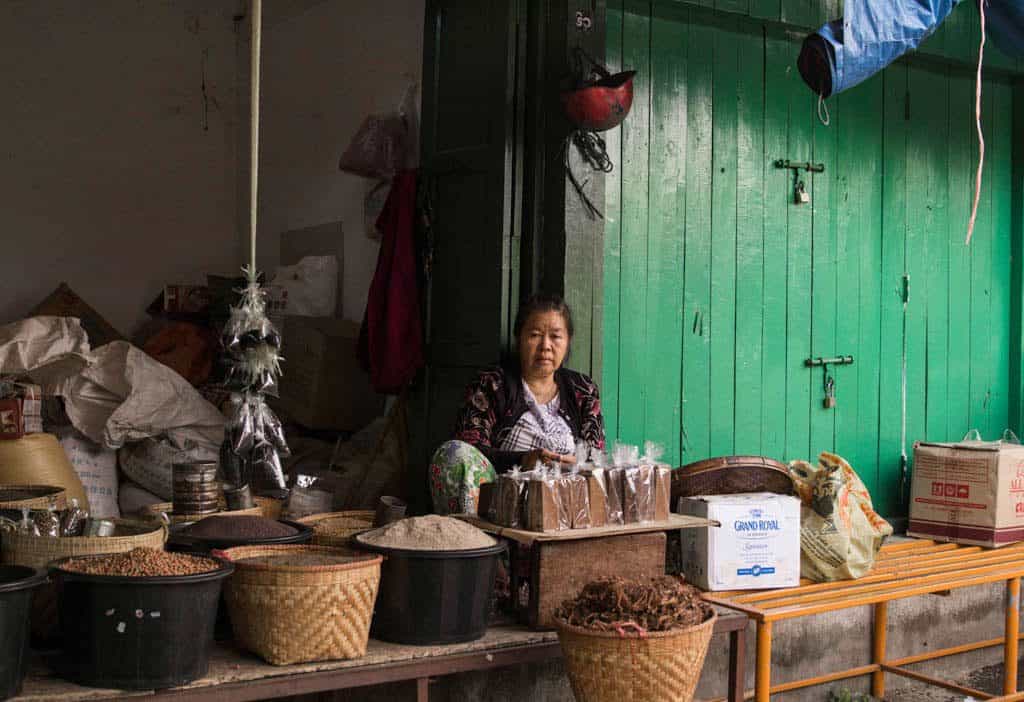
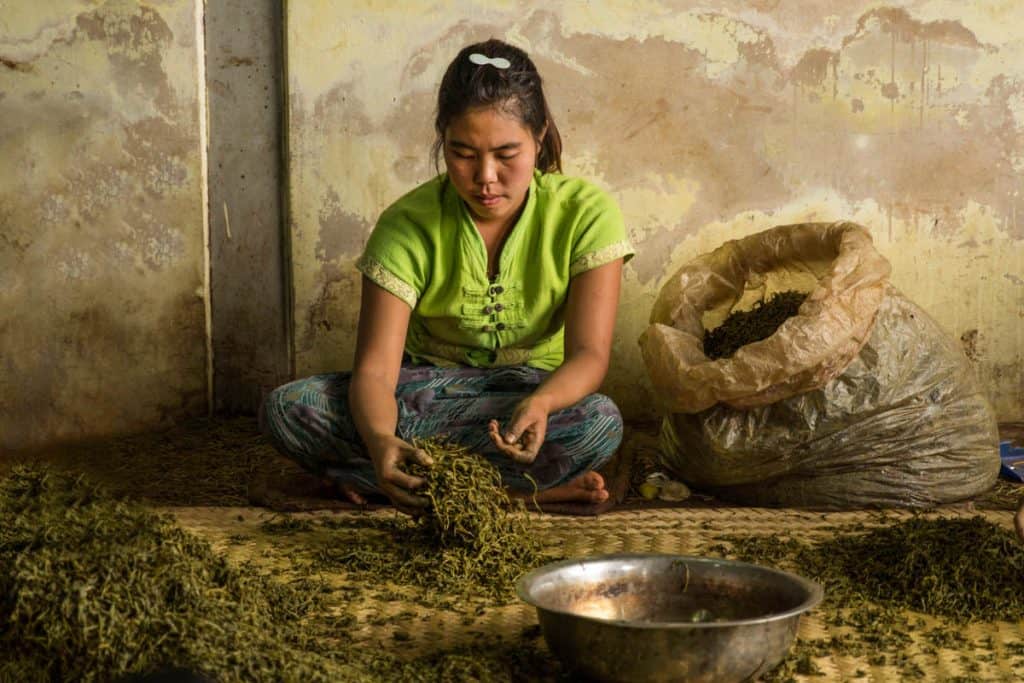
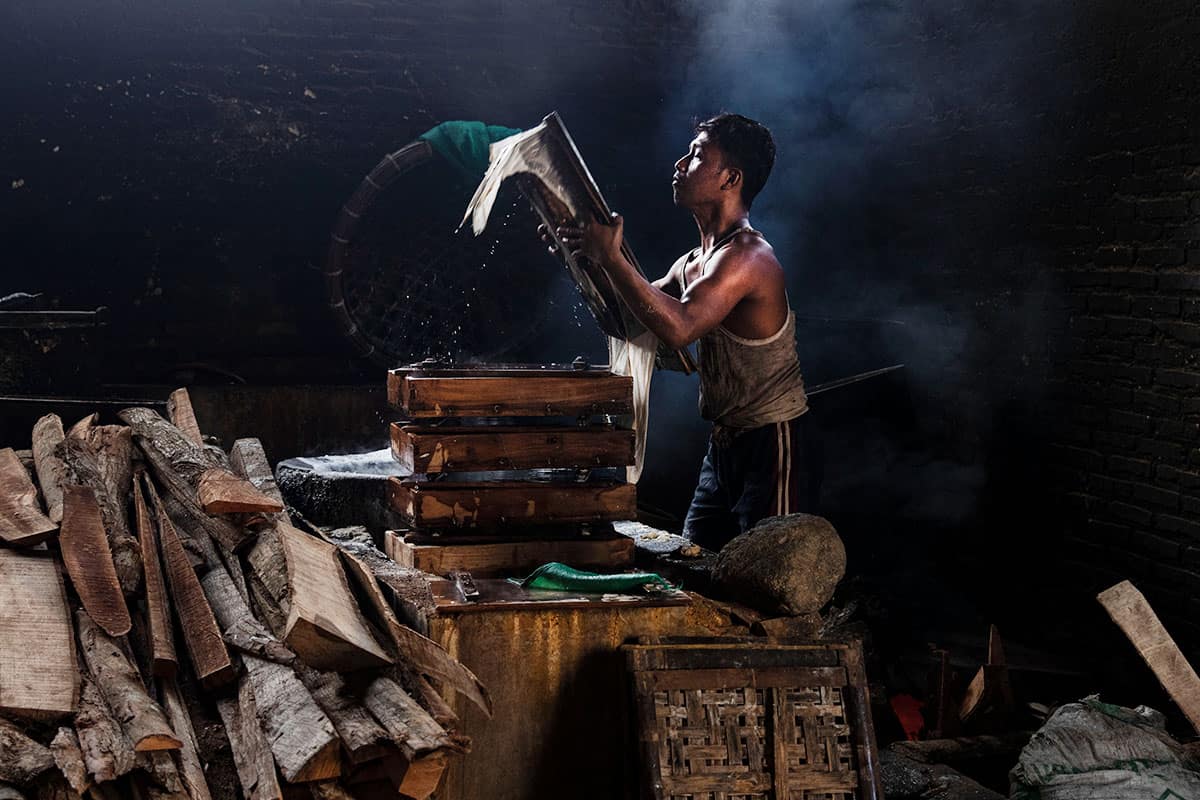
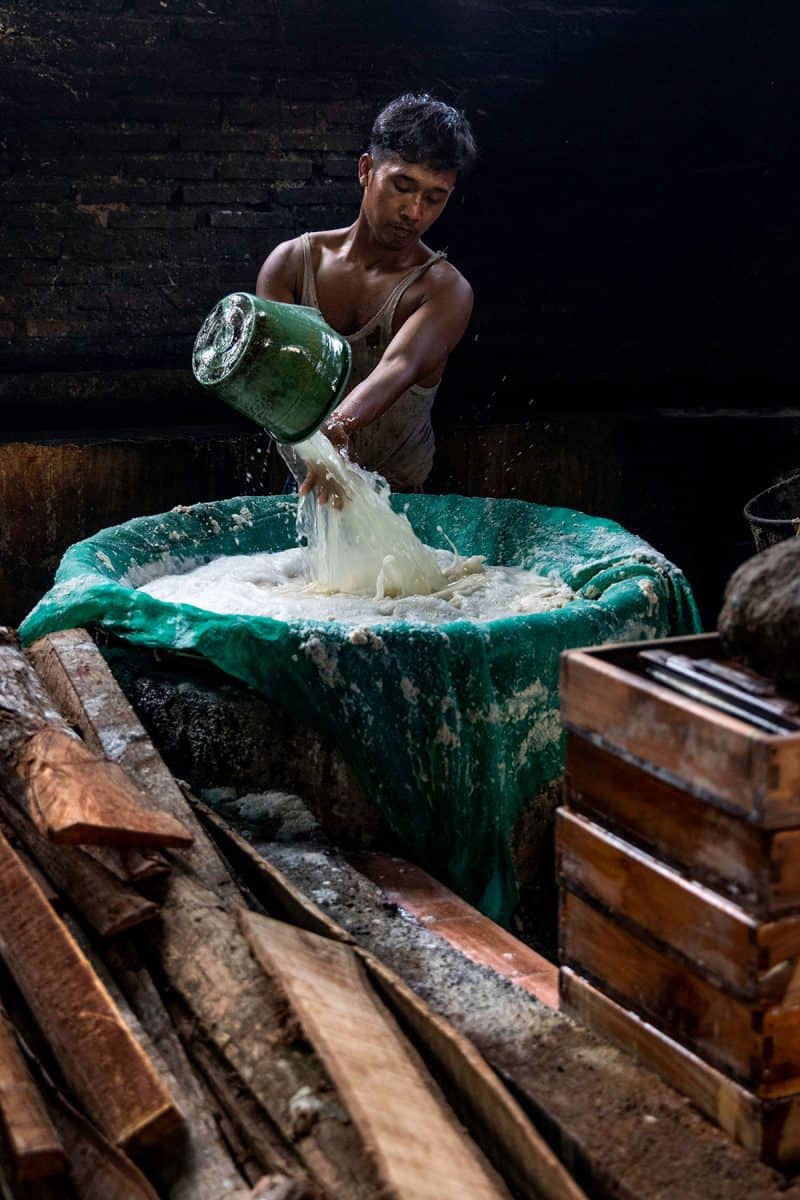
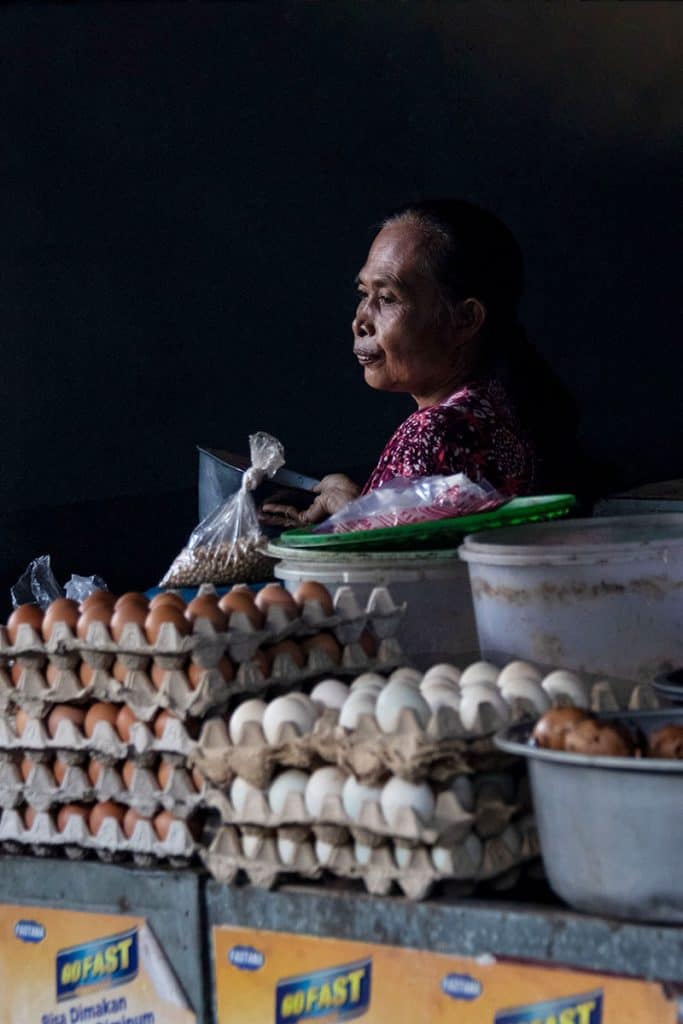
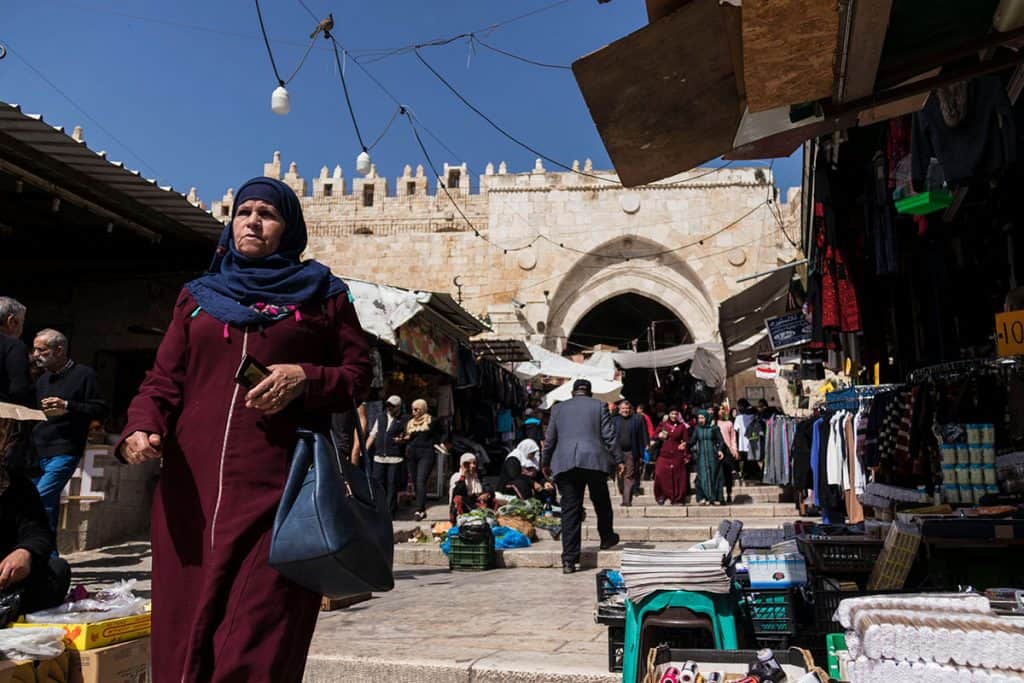
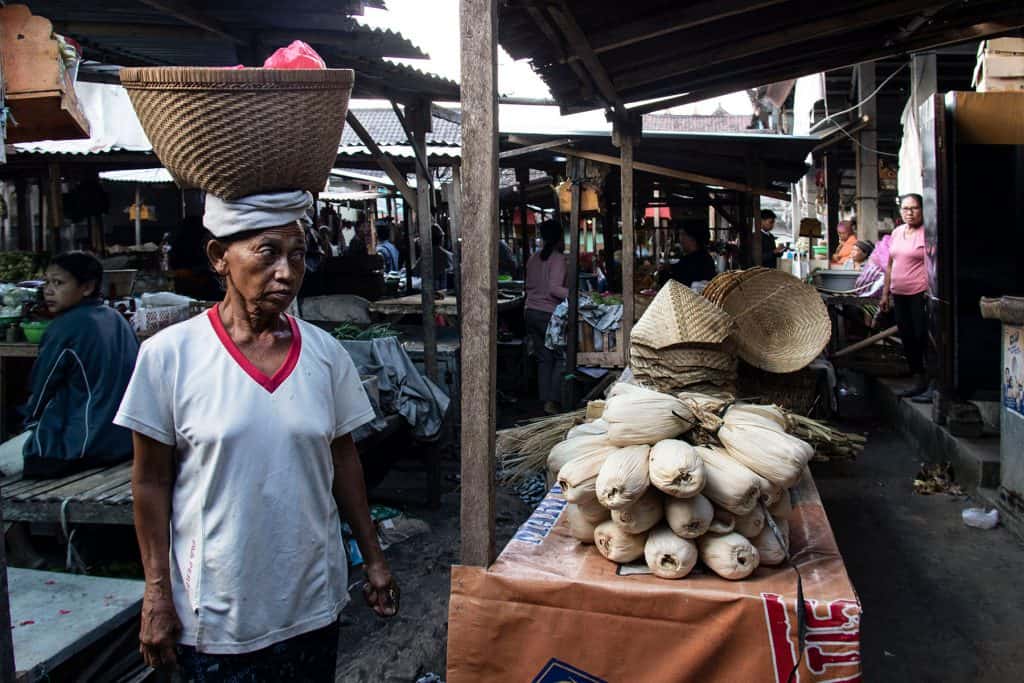
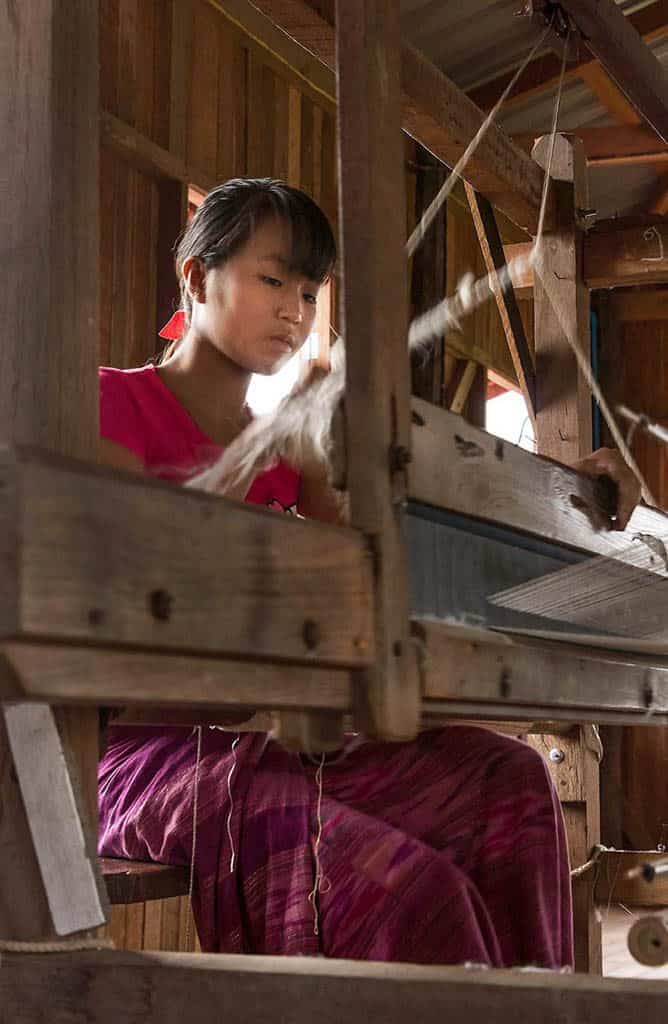
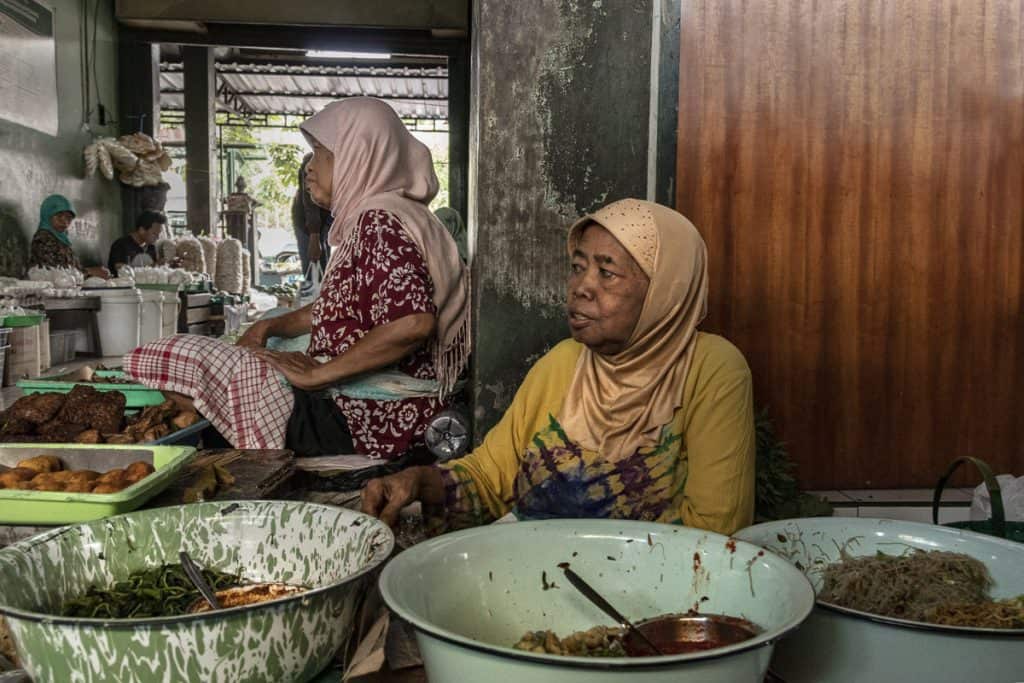
Other times, in local markets, for example, we usually buy something from the vendor. We’re always happy to have fresh fruit or nuts as a snack. When photographing local artists, we buy an item, and if we spend a long time there but know that the items are too heavy to carry, we do offer a small payment for their time.

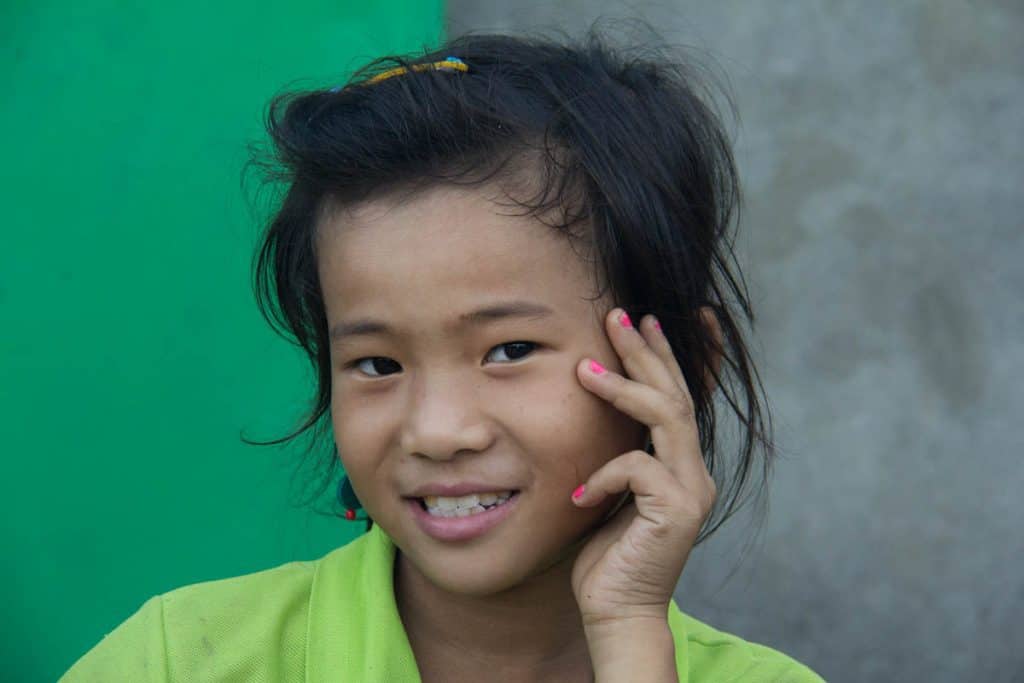
When we visit local villages in third-world countries, we try to carry with us some simple toys, crayons, or stickers to give to the local children. Some say it’s a bad habit since they start to expect it (which might be true), but it’s a simple exchange, and it’s nice to see the pure joy of these children who often don’t have access to these kind of items.

No matter what, you should always offer to show your subject the picture you’ve taken. Sometimes they don’t want to see it, but many times they will be grateful for the offer and, if possible, ask to send it to them by email. Some people even carry a polaroid camera and give them the picture on the spot.

A man making tofu in Yogyakarta
Think about the shutter if there's movement
A local Indonisian man making tofu in Yogyakarta Indonesia
Use burst mode and expose for the highlights
A local man making tofu in Yogyakarta
Tofu workshop in Indonesia

Travel Portrait Photography Tips and Tricks - Advanced

Think About the Light

As a photographer, light is your best friend or your worst enemy. The more you learn how to use the light to your advantage, the more you’ll be able to capture breathtaking travel portraits. If you have no clue about how light affects your camera, we suggest either taking the portrait in the shadow or in the light but in most cases, taking a picture when half of the frame is in shadow and half of the frame in the sun will result in a bad travel portrait unless you know what you are doing.

Generally speaking, without getting too technical, the worst time for taking travel portraits is around noon when the sun creates harsh shadows under the nose and eyes. A backlight travel portrait can be quite flattering when you know how to work with the light, and the best light for travel portraits is definitely in the late afternoon and early morning hours.

Over exposure is usually more flattering to your subjects, while underexposure is going to enhance the appearance of wrinkles and signs of time. Analyze the quality of light (is it a harsh or soft light ) and use it to your advantage.

Travel Portrait Photography Tip –  Try and plan your daily schedule according to the light. In the morning and late afternoon, you’ll have the best light, so plan for outdoor activities. During the harsh hours of midday, you can visit indoor markets or other indoor venues.

Know Your ISO Limit

ISO can be your best friend when you don’t have enough light, but you need to be familiar with your camera’s ability. Some cameras can handle  ISO 8000, while others produce very grainy images in ISO 400. You should always try and be at ISO 100 or 200 but if you don’t have enough light take advantage of the ISO capabilities of your camera.

Travel Portrait Photography Tip –  If you don’t have a lot of light, choose a lens with a wide aperture and use it to your advantage. If you have a camera with internal image stabilization, you’ll be able to work with slower shutter speeds under 1/60 (provided your subject stands still), but you can always lean against a wall or something steady which will provide extra stabilization. 

Composition

Composition is everything, and after learning how to work with light, you should spend some time learning about the different composition rules. From the rule of thirds to leading lines and the golden ratio, knowing how to compose a portrait will improve your portrait photography skills. Also, think about headroom or breathing/negative space when you compose your travel portraits.

Composition also includes choosing to take a horizontal or vertical picture. Generally speaking, most old-school photographers will probably say that a classic portrait should be vertical, and an environmental portrait should be horizontal, but nowadays, it’s all up to you. Depending on what you would like to express and how you choose to compose the picture, there are no clear rules regarding the horizontal/vertical choice.

Check out this quick overview of Steve McCurry’s , one of the most well-known travel photographers, composition tips!

Travel Portrait Photography Tip – Apply the grid option in your camera (Mirrorless, DSLR or mobile phones). It will help you compose the shot according to the Rule of Thirds.

Holy city Jerusalem
Nun walking in Jerusalem alleys
Learn to work with light to capture stunning travel portraits
market vendor in Bali's Sidemen

Break the Rules

Once you know the classic composition rules of photography, it’s time to break them. There are many stunning travel portraits that don’t adhere to any of the traditional composition rules. Think about what you are trying to express and the story you’d like to convey, and compose your frame accordingly. For example, though it’s customary to leave some breathing space in front of your subject in the direction he’s walking to, by placing your subject close to the edge of the frame, without leaving breathing space in front of him, you might express anxiety, stress, the end of a journey etc.

Think about DOF

Depth of Field (DOF) is the distance between the closest and farthest objects in a photo that appear acceptably sharp. In simpler terms, the area in front/behind your subject that remains in focus. A large depth of field means that much more area in your photo will be in focus, while a narrow DOF means that just a small area in your photo will be in focus. 

You can control the depth of field mainly with your aperture and the distance of your subject from the camera.  Large apertures (smaller f-numbers such as 1.8 or 4) means shallower DOF. Small apertures (such as f 10) mean larger depth of field. Shallower DOF provides some dreamy quality to your travel portrait and it works great with classic portraits when there’s a ‘hero’ in your shot. A larger DOF is great for environmental portraits when you want to showcase the background as well. If there are many people in your photo that stand at various distances from the camera, you have to go for a larger DOF if you want them all to be in focus.

Other than the aperture, other factors such as distance from the camera/background, the focal length of your lens, and the size of your camera’s sensor can affect the DOF. Check out this helpful DOF guide!

Travel Portrait Photography Tip – If you’re using your mobile and you’d like to have a blurry background (shallow DOF) choose the food/live focus option for Samsung or Portrait for iPhone. 

Change Your Angles

When you attempt to take a portrait of someone, do you choose to take a picture at eye level, or do you go for a higher/lower angle? Choose your camera angle, depending on what you want to convey

The classic portrait is usually taken at eye level. This way, the subject looks directly into the lens, which enhances the feeling of connection between the subject and the spectator.

However, a lower angle, when the camera is slightly lower than eye level and tilted up, can provide some kind of authority to your subject and contribute to making him the hero of your shot. If you choose a lower angle, do so with caution since it can be unflattering if the camera is too low.

A high angle puts the focus mainly on the face and can help create beautiful light in the eyes of your subject (catch light) since they are looking up towards the light source. It’s also great to show artists with all of their arts and crafts or while working, but you should pay attention to the depth of field and think about what you’d like to be in focus, and choose your aperture accordingly.

Travel Portrait Photography Tip – Always try to take a few pictures at different angles and various compositions. Sometimes a few steps to the right or lowering your angle makes all the difference in the world. In addition, you can play with your angle/composition/DOF to eliminate distracting elements in your shot. 

Woman in the market of the Muslim Quarter in Jerusalem
Look for interesting people and be ready with your camera
Sidemen market in East Bali
Get close and use a wide lens for an enviorenmental portrait

Think About Focus

First of all, you need to learn everything you can about the focus system in your camera. If you don’t nail the focus in your travel portrait, there’s really not much you can do about it; the portrait will be unusable.

Now think about where the focus should be. Most times, It should be on the eyes but sometimes it can be elsewhere, depending on what you’d like to emphasize and your composition. The shallower DOF, the harder it is to nail the focus. So when in doubt, opt for a smaller aperture (larger f no.). With extremely wide aperture numbers like f1.8, it’s much harder to nail the focus.

Travel Portrait Photography Tip – Some cameras have face/eye detection systems, so it’s easier to nail the focus, but with other cameras, your best bet is to work with a single focus point.

Know How to Use Your Manual Focus

When in doubt or when your camera struggles to focus, switch to manual focus. Many cameras let you enlarge the area you’re focusing on, so it’s easier to nail the focus.

Know Your Camera – Custom buttons & Functions

It’s always a good idea to get to know all the functions of your camera. If you’re a beginner, you can use the Auto function. However, most times, you’ll get better results while using one of the semi-automatic (shutter/aperture priority)  or manual mode.

Travel Portrait Photography Tip – Other than the shooting modes and ISO capabilities learn about the most important functions of your camera that can help you improve your travel portrait photography. Try to shoot in burst mode, so you don’t miss a moment. Learn about the focus system, light-metering and so on. 

Tell a Story & Evoke Emotions

The most mesmerizing portraits tell stories and evoke emotions. Think about your favorite portraits, often times you can see the emotions of the subject, spontaneous laughter, a gesture of heartbreak, an expression of delight or any other kind of emotional spark. Even when you stage someone, you can create candid moments that will highlight the situation and your hero.  

Furthermore, try to tell a story with your portrait. You can shoot your hero in his/her environment and include everyday objects/tasks, or you can capture the interactions of several people like a group of children, market vendors, a father and son, and so on.

a woman is working in the lotus weaving factory in myanma burma
Look for intresting angles and framing
myanmar Pa’O women in inle lake market
Candid shots are more natural
Girl with thanaka
Wait for the right moment
foot covered in thanaka and colorful longyi
Look for intresting details

Look for a Nice Location & Wait for the Shot

That’s one of the most important rules that can genuinely make a difference. The problem is it can take a long time to take the shot. When you see beautiful scenery and the light conditions are great for your travel portrait or street photography, you want to wait for the right moment for someone interesting to pass by.

Travel Portrait Photography Tip – For these kinds of situations, it is always better to shoot in burst mode 

Use Colors, Textures, Patterns & Light

Colors add so much life and vitality to an image, so look for these colorful spots/ walls/ objects and incorporate them in your photo. Use patterns and textures to your advantage to add depth and interest to your travel portrait, and always think about the light and backdrop. Ray of lights can add so much drama to a scene. If you’re trying to capture someone who is smoking or a steamy dish, a light source and a dark backdrop will enhance the drama in your shot. 

Go Off the Beaten Path

We always try to find off-beaten-path locations. Sure, we want to capture the most famous places in each destination we visit, but for a less touristy experience, we recommend finding these places that not many tourists know about. There’s something much more authentic when you visit a local market than the touristy one and we’ve visited many of those in Sidemen area in Bali. We are always looking for neighborhoods and towns we don’t know much about, and usually, we discover hidden gems like the Istrian peninsula in Croatia. The residents are usually surprised to see tourists there and are much more patient and willing to have their portraits taken.

Look for Inspiration

If you want to be a better photographer, you need to learn from the best and seek inspiration. There are so many great travel and portrait photographers. Look for inspiration on Instagram, Pinterest, Google, or wherever you can find it. Think about which portraits you will remember or which ones evoke emotion and determine how the photographer has achieved it.

A girl from the hill tribes of Vietnam wearing traditional; clothes
Candid shot vs. a not-so-candid one - learn how to make it more natural
Two women from Sapa's Hill Tribes
I talked to them for a while and made them laugh to get a more natural portrait

Tips for Taking Environmental Portrait While Traveling

Environmental portraits must showcase the surrounding of your subject. We’d often opt for a horizontal shot, but depending on the environment, we might go for a vertical shot. It doesn’t really matter as long as your viewer can recognize the environment and your image tells your subject’s story.

Don’t go for an ultra-wide aperture like 1.8; otherwise, the background is going to be blurry. We usually go for f/5.6-11 depending on the setting and what we’d like to emphasize.

Since you’re photographing a relatively large area, think about the composition. What would you like to include in your frame, how are the light conditions, do you prefer a staged/posy portrait, or do you want to capture your subject in action? After you have your answers, give directions to your subject, ask him to move according to the light conditions, tell him what to do (go about his business or pose for you), and change your angles so you’ll have a variety of shots.

Tips for Taking Classic Portraits

Classic portraits focus on your subject, so you don’t really have to pay much attention to the environment, even though sometimes it can improve your shots. For example, if there’s a beautiful colorful wall, use it as your backdrop, include some leafy greens in your photographs etc.

In the past, many photographers believed classic portraits must be vertical, but nowadays, the rules are more flexible. It really depends on your subject, what you would like to emphasize, and the intended use of your image. We usually take some vertical and some horizontal shots.

Choose your aperture according to your framing and be aware of the depth of field. Always make sure the eyes are in focus, and usually you’d want your subject to be lightened evenly across his body/face unless you work in manual or aperture priority and you know how to expose for the shadows or highlights.

Sometimes people feel awkward while they pose. You can give them something to think about or fuss about to evoke emotion and make the portrait more natural. Ask an artist to hold his tools, ask a child to play with his/her favorite toy.

Tips for Taking Portraits of Details

Details portrait can be powerful, but you have to make sure they can still depict a story, evoke an emotion, or shed light on the culture/person you photograph. You can play around with the depth of field depending on what you’d like to convey. Sometimes you’d like to highlight just one item (choose a wide aperture), or you’d like the majority of things to be in focus (choose a narrow aperture like f8).

If there’s movement in your shot (like the hand of the artist), you need to think about your shutter speed. If you want to freeze the motion, choose a higher shutter speed like 1/250 to be on the safe side (the faster the movement, the higher the shutter speed should be in order to freeze it).

Tips for Taking Candid Portraits

Candid moments are usually best to capture emotions and tell stories simply because once you ask someone to take his picture, his demeanor changes, from the facial expression to the body language. However, don’t be afraid of posing your subject because sometimes it’s the best way to capture great travel portraits. The secret is you need to create these real moments that occur naturally and evoke emotional sparks. Ask your subject about himself until he relaxes a bit, tell a joke to catch his genuine laughter, ask an artist to continue working or ask a vendor to grab some fruits.

vendors in morning market
Markets are great for environmental portraits
a praying man in Shwedagon pagoda
Look for interesting colors or patterns

Editing Your Travel Portraits

Nowadays, post-processing is a must, especially when shooting RAW. Try to use Photoshop, Lightroom, or any other photo editing up to your advantage. Eliminate distracting colors, enhance the important elements in your image, get rid of noise etc.

Travel Portrait Photography Tip – Shooting RAW will give you more options while you edit your travel portraits. You could salvage some of your under-exposed/over-exposed images. If you have a good camera, you probably have the option to shoot in RAW files. Many mobiles also give you such an option, and so are some photography editing apps like the mobile version of Lightroom (DNG is RAW).

Equipment

As a travel photographer, you usually don’t carry a lot of equipment with you. Some prefer a zoom lens, while others like to work with prime lenses (with a fixed focal point). Generally speaking, for classic portraits, you’d better use a focal point of 50 mm or above since it’s more flattering to your subject (wider lenses have a distortion effect). However, for environmental portraits, use semi-wide and wide lenses (35mm and below). The wider the lens, it can have a slight distortion, depending on the quality of your lens but you could fix in post-processing.

Most times, you will shoot in natural light, but you can have a foldable reflector with you if you need a boost of light. However, nowadays, especially if you shoot in RAW, you’d be able to open up the shadows in post-processing.

A flash can be an excellent addition to your portrait photography kit if you know how to use it. Bouncing the light from a white wall or using an off-camera flash allows you to adjust the lighting conditions to your liking, but it means carrying more stuff with you.

A Word About Model Releases

Portrait photographers need to be aware of model releases, especially if they plan to sell their travel portraits to stock photography sites or make commercial use of them. In general, if someone is in a public place, technically, you do have a legal right to photograph him, so why do you even need a model release?

The bottom line is that in order to use a travel portrait on your social media/website/private use, you do not need a model release, but you should think about your subject’s privacy and show your respect. If someone clearly doesn’t want his photo taken, don’t use it. As long as you do not portray your subject in a negative light, you should be ok.

When talking about selling photos, you can sell travel portraits to individual people or for editorial use without a signed model release. However, you can not use these photos commercially or sell them to stock photo sites since they require such a release. You can read more about model releases or if you’d like to have an app for model release on your mobile just in case, here are some great choices.

That’s it for our travel portrait photography guide. We hope we’ve given you some useful tips to improve your travel portraits and feel free to ask us anything or add tips of your own in the comments below.

Don't forget to pin our guide for later!

travel portraits ultimate guide
taking poeple's photos while traveling

Check out some of our other guides!

Dome of the Rock in Jerusalem

Jerusalem in Photos

Check out our Jerusalem photo diary and learn about the best sites for photographers in the holy city!

Food Photography

Check out our ultimate guide to take stunning food photos while traveling, including tips, tricks and examples!

colorful graffiti in madrid

Madrid Neighborhoods

Our Madrid neighborhood guide lists the top things to do in our favorite Madrid neighborhoods!

4 thoughts on “Travel Portrait Photography – Tips For Taking People’s Photos While Traveling”

  1. This is a nice tutorial. I will surely try it later. I think this tutorial will help me a lot. I would like to read more of your article in future. I wish you best of luck for your next article.

Leave a Comment

Your email address will not be published. Required fields are marked *

This site uses Akismet to reduce spam. Learn how your comment data is processed.

Scroll to Top